Article by: RobertRO
Models: All BMW models with the M30 engine (or similar SOHC 4 cylinder engines).
I needed a tool to easily remove the M30 cylinder head camshafts.
Since I don’t have the BMW special tool, I had to go for a DIY approach.
I used only materials that one can find at a metal supply store, and some common tools.
It was easy and inexpensive to manufacture it (sure, I needed to work a few hours).
The tool works great. Therefore, I thought it may be useful to share the design, for other DIY enthusiasts. Note that you do not have to be crazy with the precision.
Materials:
(a) mild steel flat bar, width 20mm x thickness 4mm x length ~1m;
(b) mild steel angle bar, size 30mm x 30mm x 3mm, length ~1m;
(c) good quality steel threaded rod, M12 thread, 2 pcs. ~1m long each;
(d) steel threaded rod, M10 thread, either 1 pc. 2m long or 2 pcs. 1m long each;
(e) 8 pcs. M10 nuts;
(f) 8 pcs. M10 steel washers, usual size;
(g) 8 pcs. M10 locking nuts (nyloc insert);
(h) 8 pcs. large and thick steel washers (e.g. 30mm OD, 10.5mm ID, 2mm thick);
(i) 8 pcs. rubber washers, same size of slightly larger than the wide washers. You can also make them from a large piece of thick rubber or other soft material. Their purpose is to protect the cylinder head mating surface.
Tools:
– steel saw;
– electric drill and 10mm and 12mm bits (recommended: a smaller diameter drill for pilot holes);
– M12 thread tap;
– semi round steel file (about 16-18mm wide).
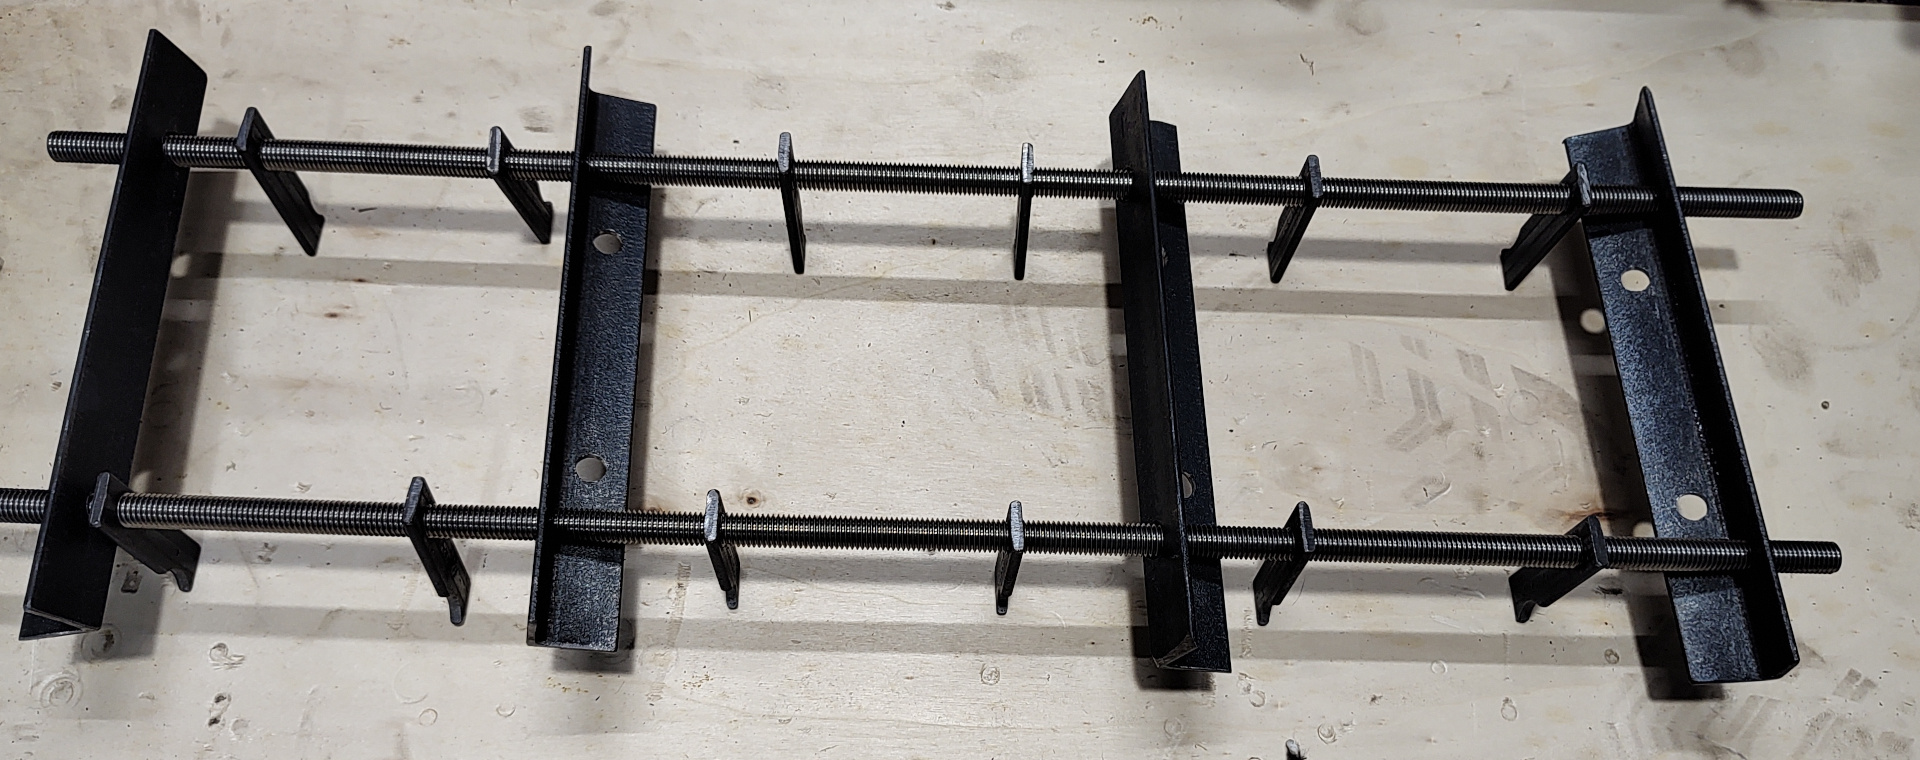
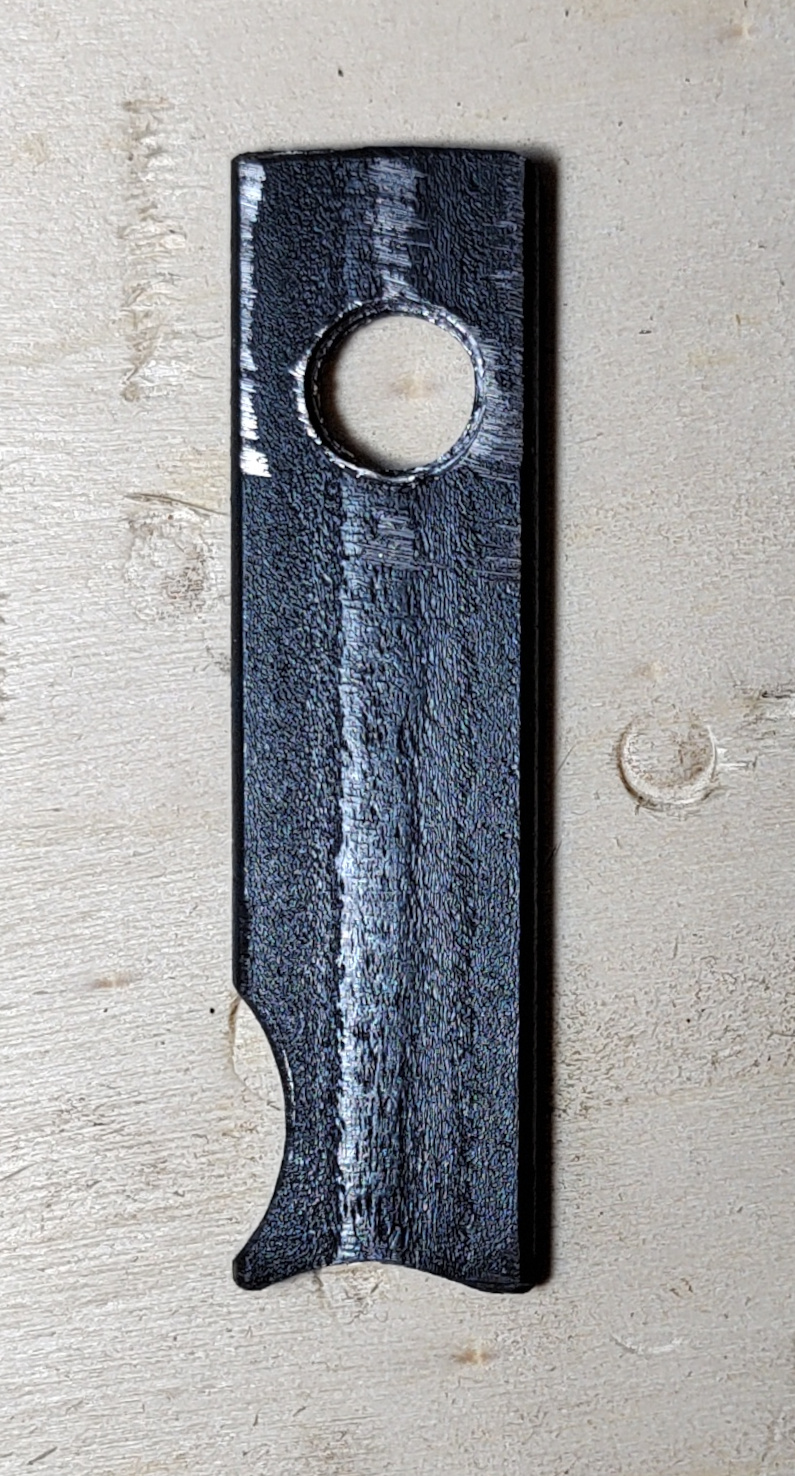
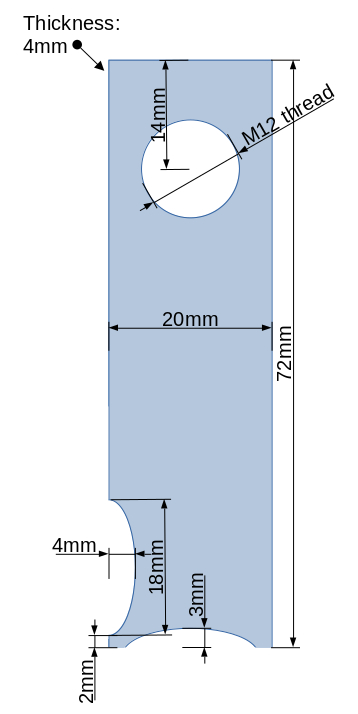
From the mild steel bar (a) cut off 12 flat tabs, 72mm long each.
For each tab: drill a 10mm hole, 14mm from one end of the tab and centered in between the edges. Run the M12 thread tap through the hole. Using the semi-round file, cut in two dips ~ 3mm on the opposite end of the tab, and ~4mm on the side, as pictured. The purpose of the first dip is to avoid the tab slipping off the eccentric, while the second one is for the tab to clear off the rocker while pushing on the eccentric.
From the mild steel angle / “L” bar (b) cut off 4 pieces, 200mm long each.
Drill two 12mm holes on one side of the “L”, spaced 146mm (center to center). The OD of the holes should ideally be tangent to the inside corner of the “L”. Then, drill two 10mm holes on the other side of the “L”, spaced 93mm (center to center).
Cut two pieces of M12 threaded rod (c), each 67cm long.
Cut 8 pieces of M10 threaded rod (d), each 25cm long.
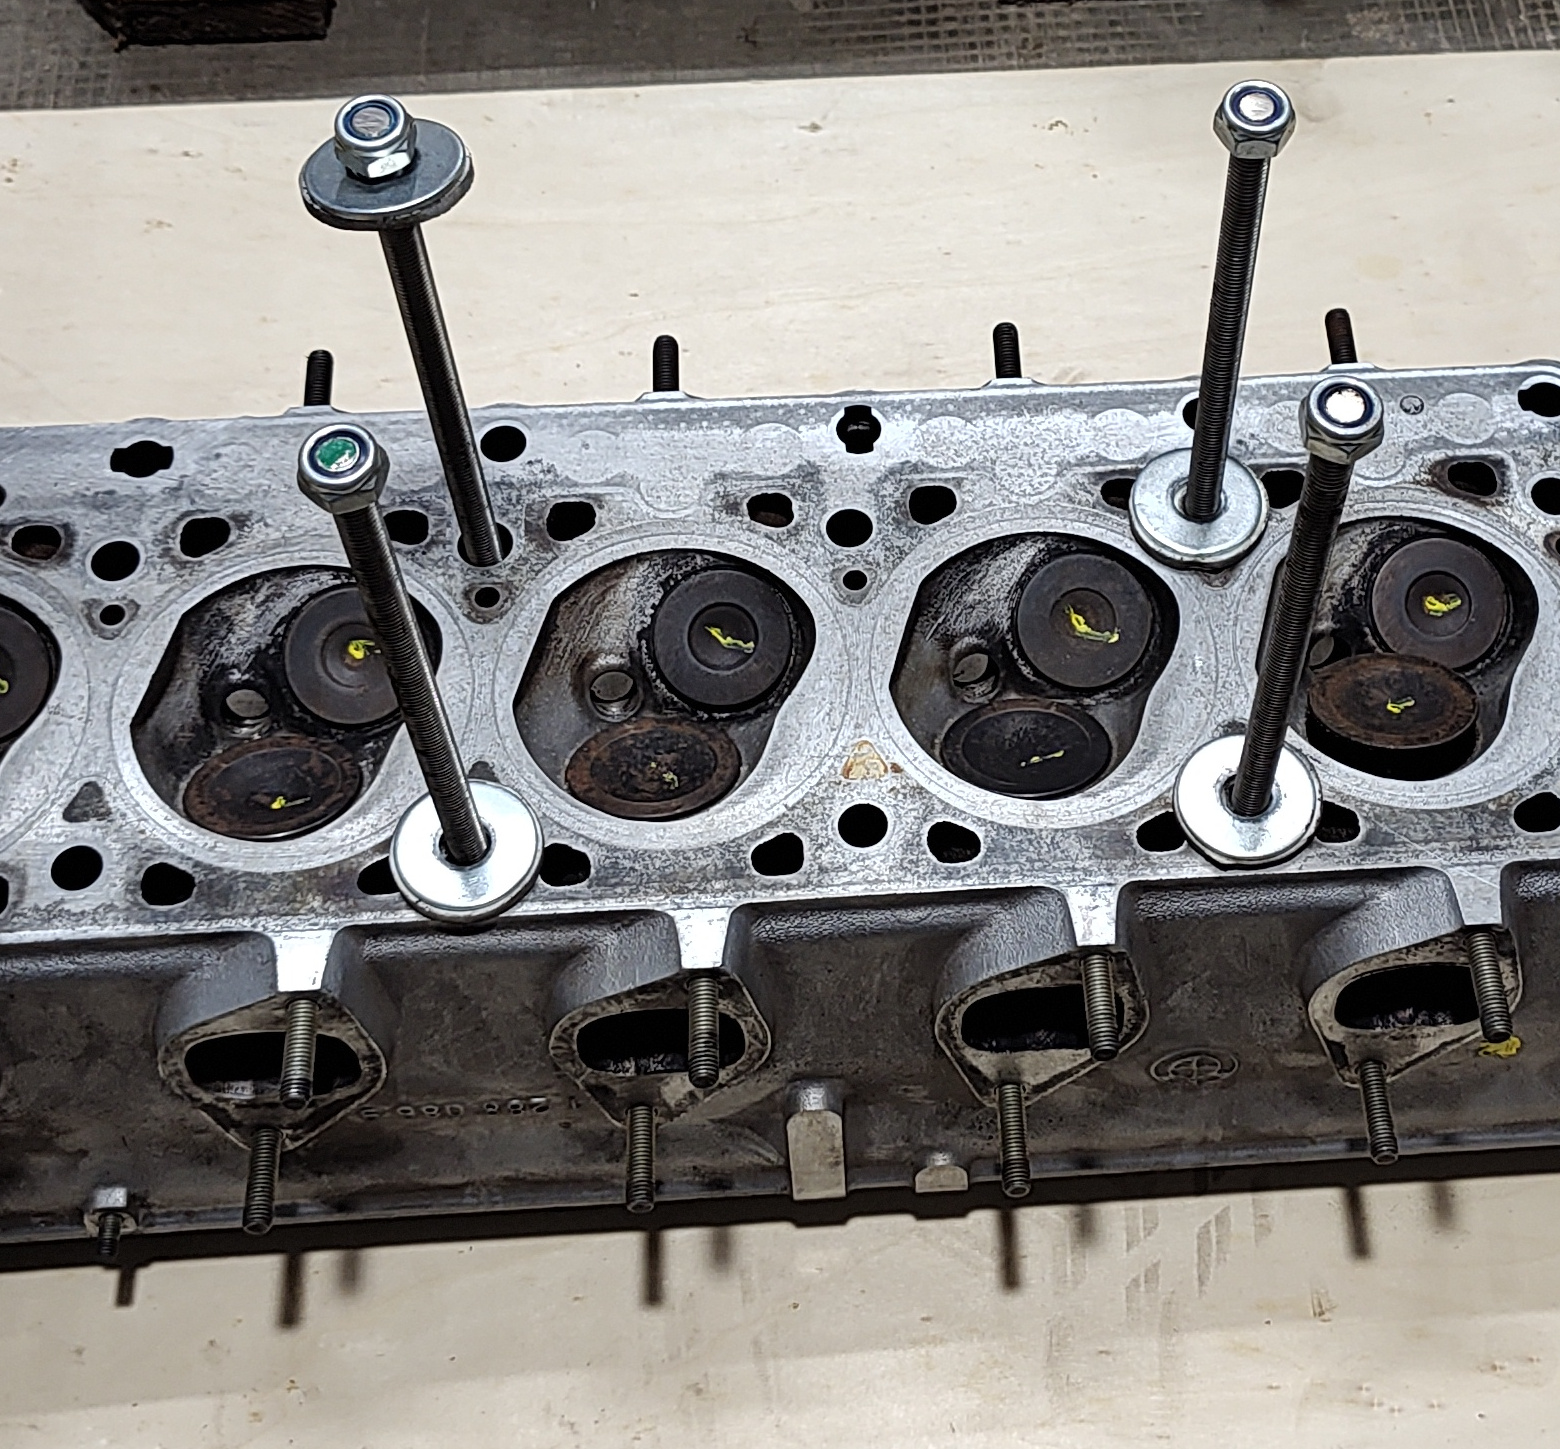
For each rod, install a M10 locking nut, flush with one end of the rod, then slide first a wide steel washer (h) and then a rubber washer (i) down the rod, up to the locking nut.
Notes:
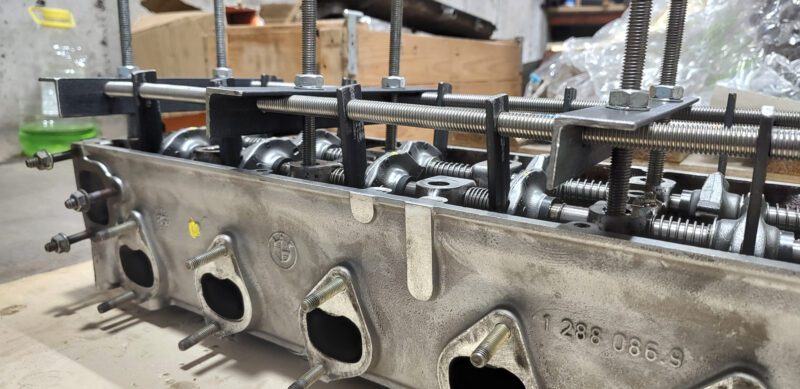
– see the pictures at the links below, to figure out how each part of the tool looks like, and how the parts are assembled;
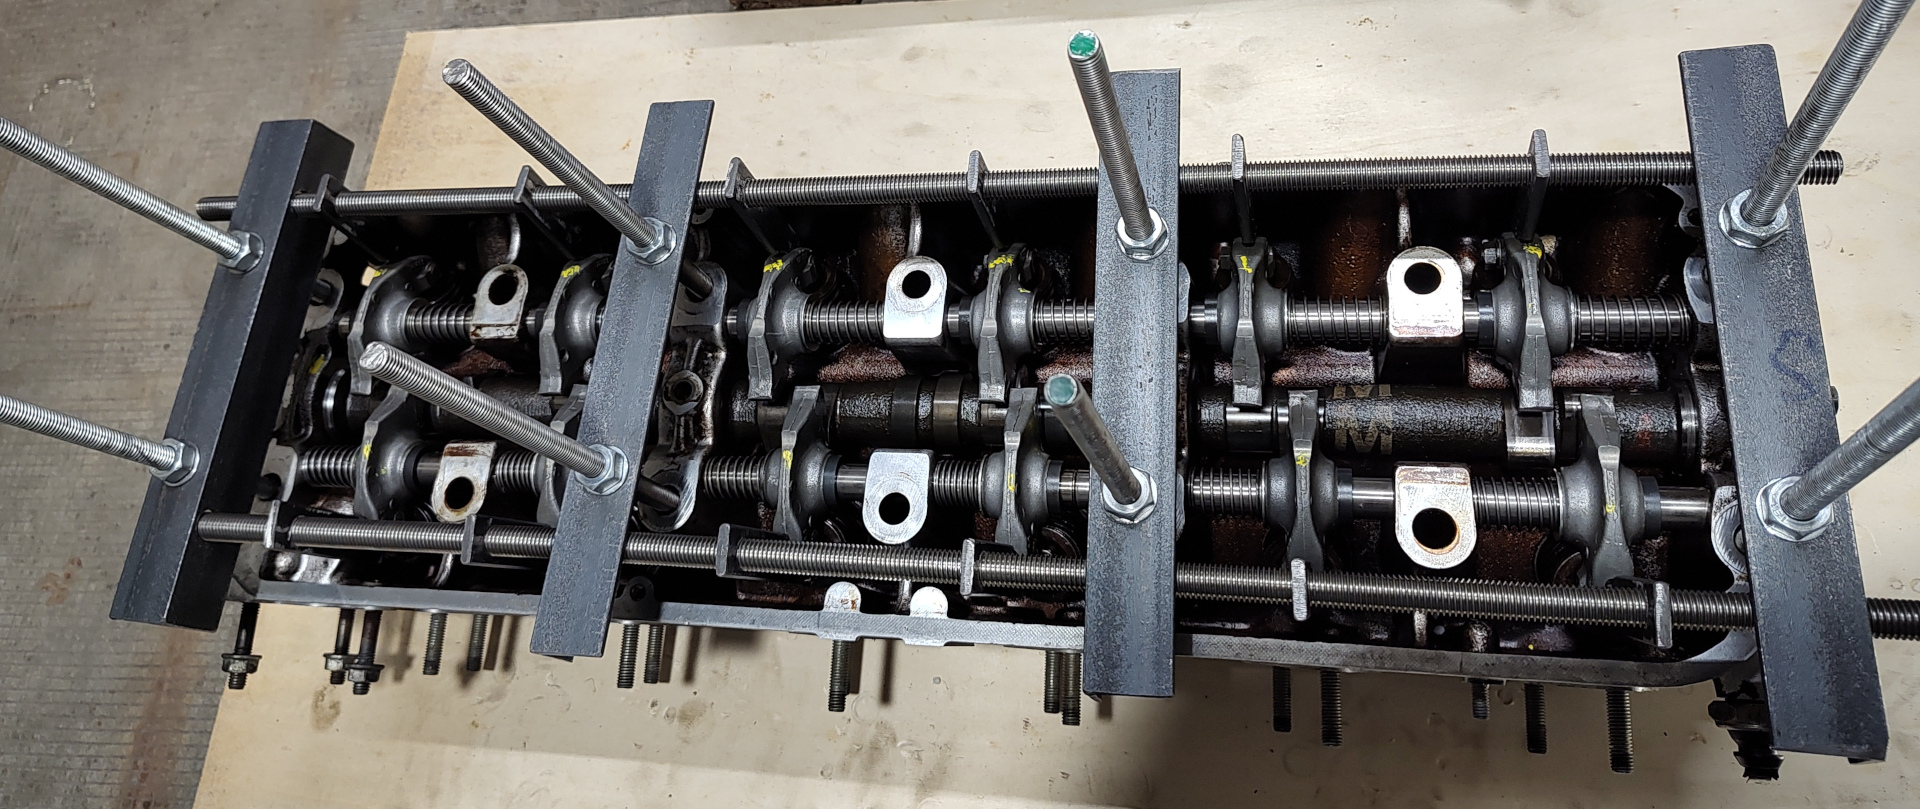
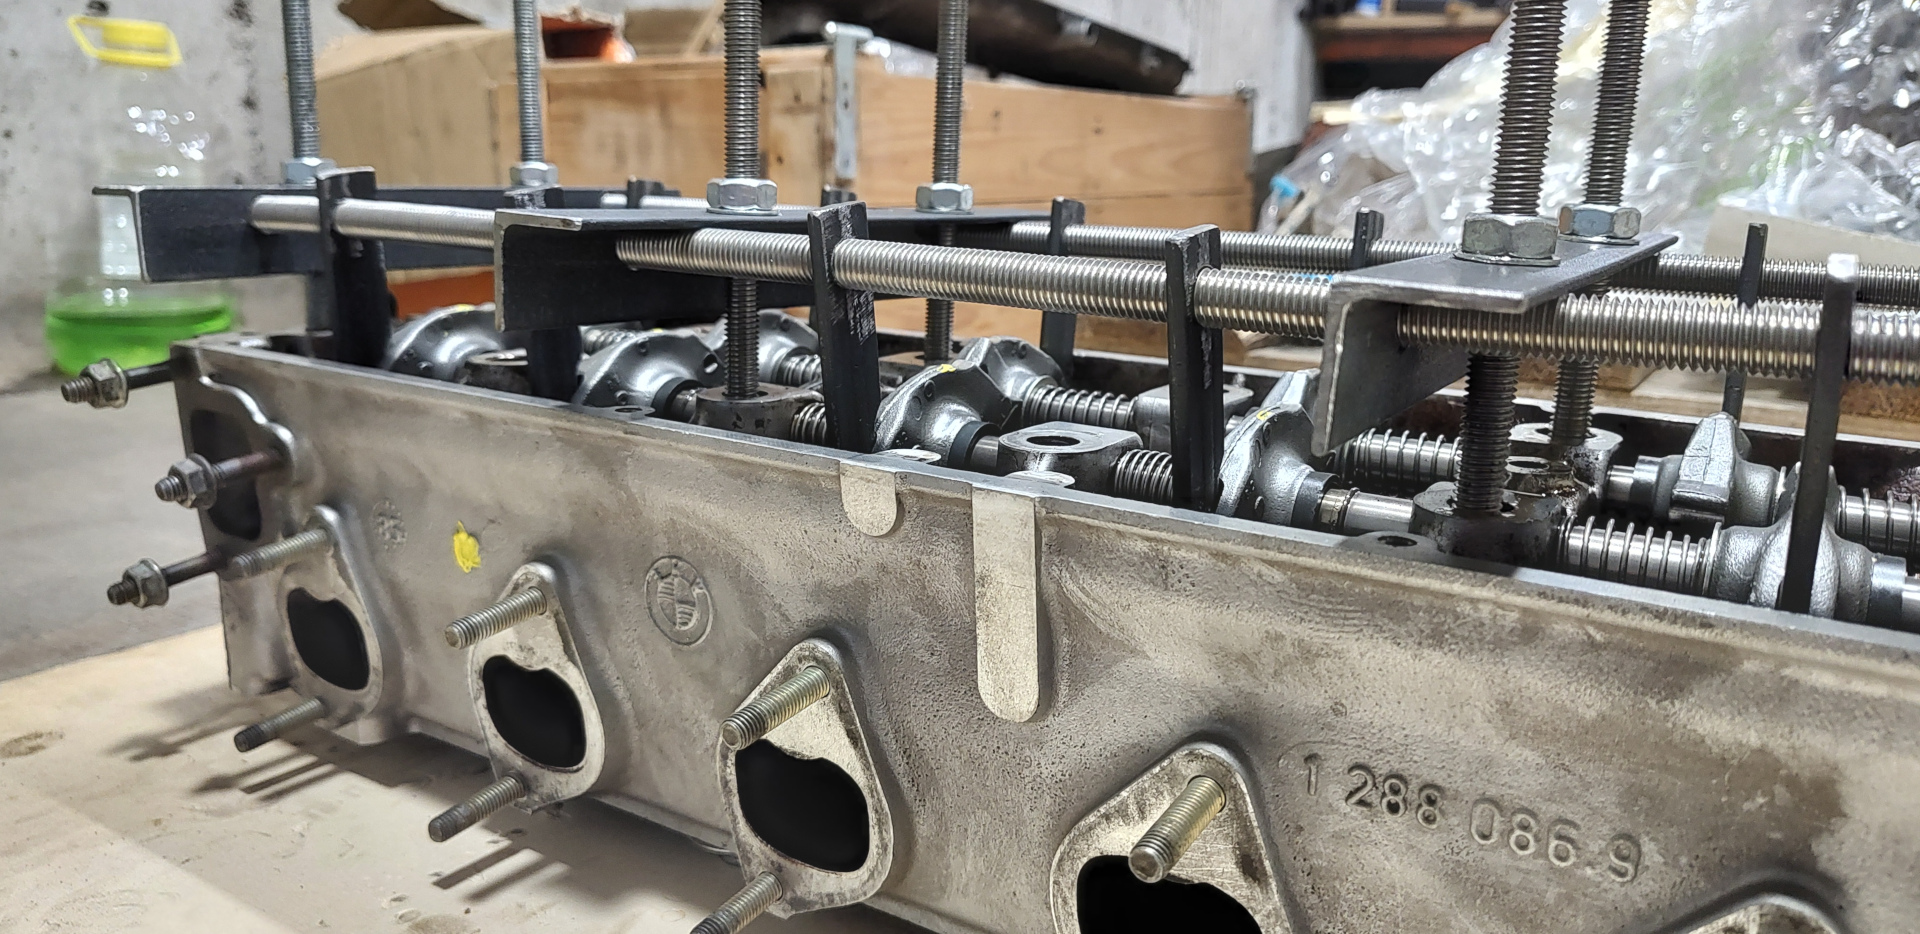
– once the tool is installed on the cylinder head, you may lay the cylinder head face down. The M10 locking nuts and large washers provide enough clearance for the valves to safely protrude out of the combustion chamber.
When using the tool, it is important to follow the instructions applicable to the original BMW special camshaft tool:
1. Adjust the eccentric of all rocker arms to maximum valve clearance.
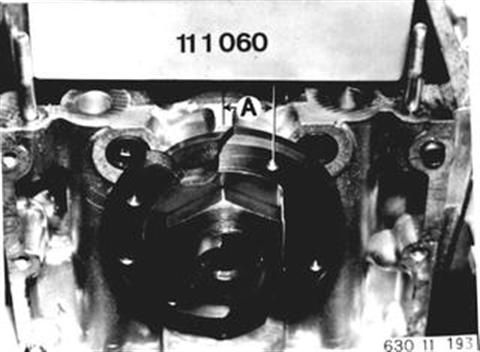
2. Turn camshaft from TDC position of cylinder 1 toward intake by distance A = about 15 mm (see picture).
3. Move rocker arms on intake side of cylinders 2 and 4 forward by about 7 mm ( I still don’t understand why this is needed).
4. Mount the camshaft removal tool.
5. VERY IMPORTANT: To prevent any contact between valve disks, first tighten the exhaust side nuts of the tool, and then the intake side nuts. Reverse the sequence when removing the special tool.
See pictures below:
